
Shop landing page
To create eCommerce flow, we have utilized NationBuilder’s calendar/event functionality. So here for the shop landing page, you need to create the Calendar page. Follow the steps below:
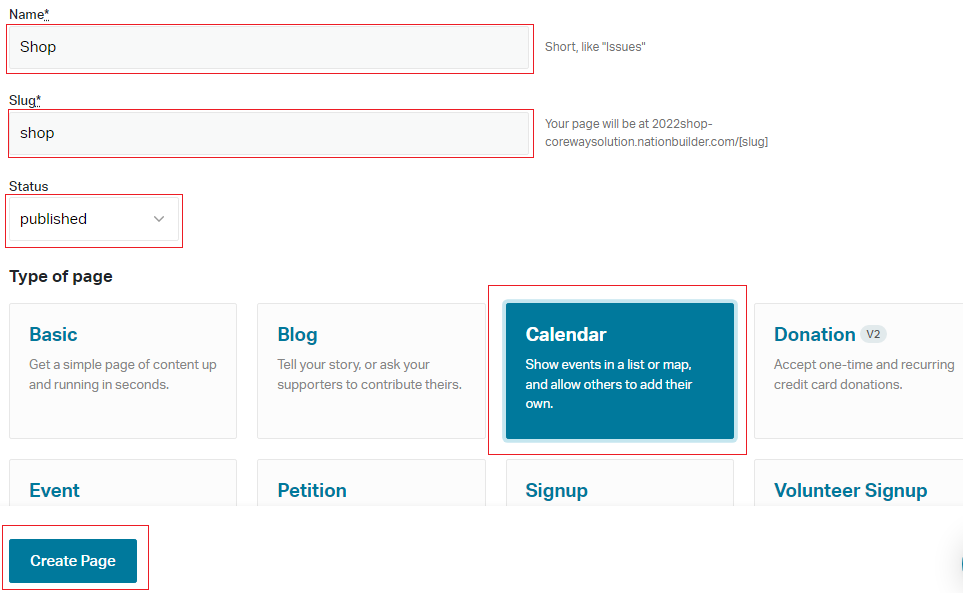
- Go to + New page in the main menu of your site. Give it a name as you need but we recommend using the “Shop” name. Change the Status to “Published” and choose “Calendar” for the Type of page.
- Make this landing page a homepage (Optional). Go to the page settings and mark the “Make this the home page” option. This will make this page to be the one that shows when a person lands on your site. Remember to first uncheck all the buttons and check only the “Make this the home page” and “Include in top nav”.
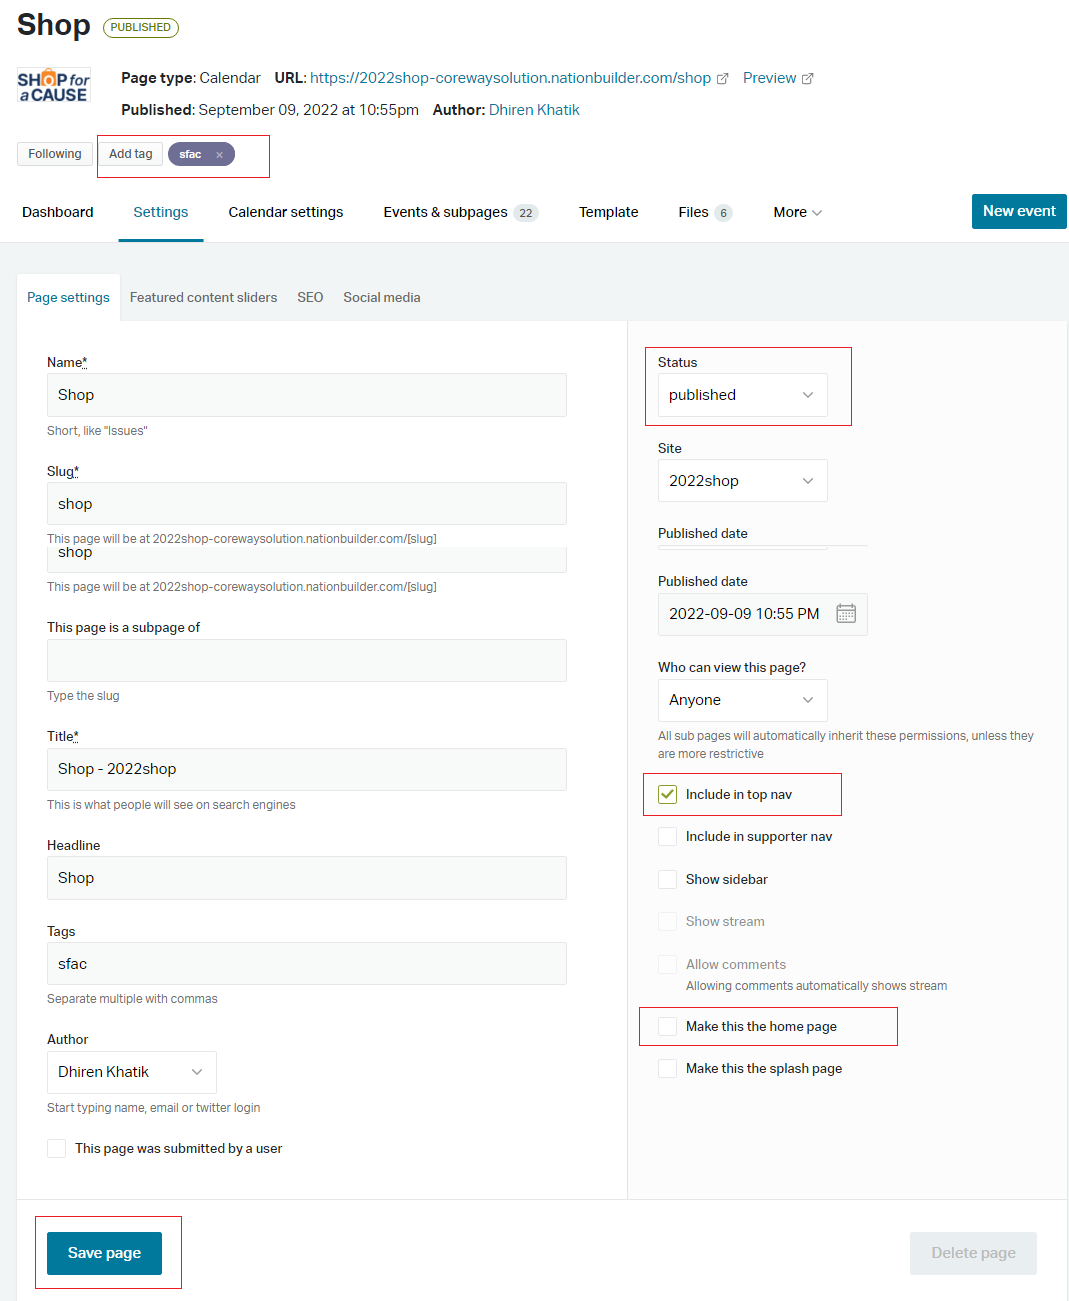
- Add the page tag: sfac
This tag will distinguish your shopping landing page from the calendar page event page.
Banner slider
The Banner slider will appear at the top shop landing page.
To add a banner slider, in admin navigate to Settings > Featured content sliders. Add a name to the label. Home page only add Headline / Action text see below screen sort
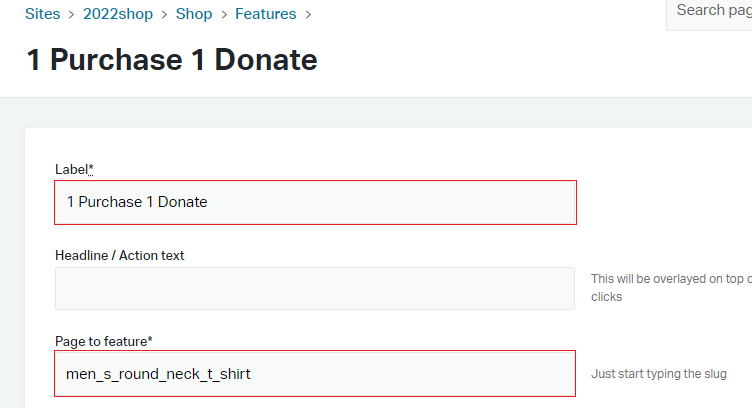
Label: Anything that helps you recognize the slider
Headline / Action text: Keep it blank if you want to have a full-screen slider. If you will add text here, the image will be displayed within half portion and half portion will be covered by text.
Page to feature: slug of any page that you would like to link on this banner.
Image: Upload your image. Recommended dimensions: 1920px X 960px.
FYI: The text you see over the banner is crafted inside the image.
Advertisement banner
You can add promotional banners like what you see above. To create them, follow the below steps:

- Create a new “basic” page and give a tag ‘advertise_banner‘
- Add a Featured content slider image to Settings > Featured content sliders.
- Fill out the following fields:
- Label: Any name that helps you recognize this image
- Page to feature: slug of any page
- Image: Upload your image. Whatever text you want over the image, you should draft it inside the image.
The recommended dimension for this image is 625px X 417px
- You need to add another slider for another banner.
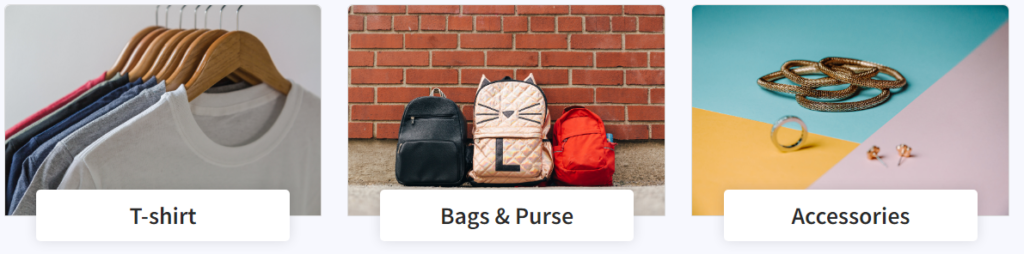
Categories
You can categorize your products with the categories. We have utilized NationBuilder’s tag system for the categories.
To link your product to a specific category, you have to give ‘shop‘ prefix in front of your category name. i.e: To link your product to the “Bags & Purse” category, you should give a tag like “shop Bags & Purse“. So it will link this product to Bags & Purse category as well as it will create a “Bags & Purse” category if it doesn’t exist.
Category thumbnail image
To add a category thumbnail image, please go to the main Shop landing page and there go to “Files” tab and upload the thumbnail image with the name “category_slug_name”.
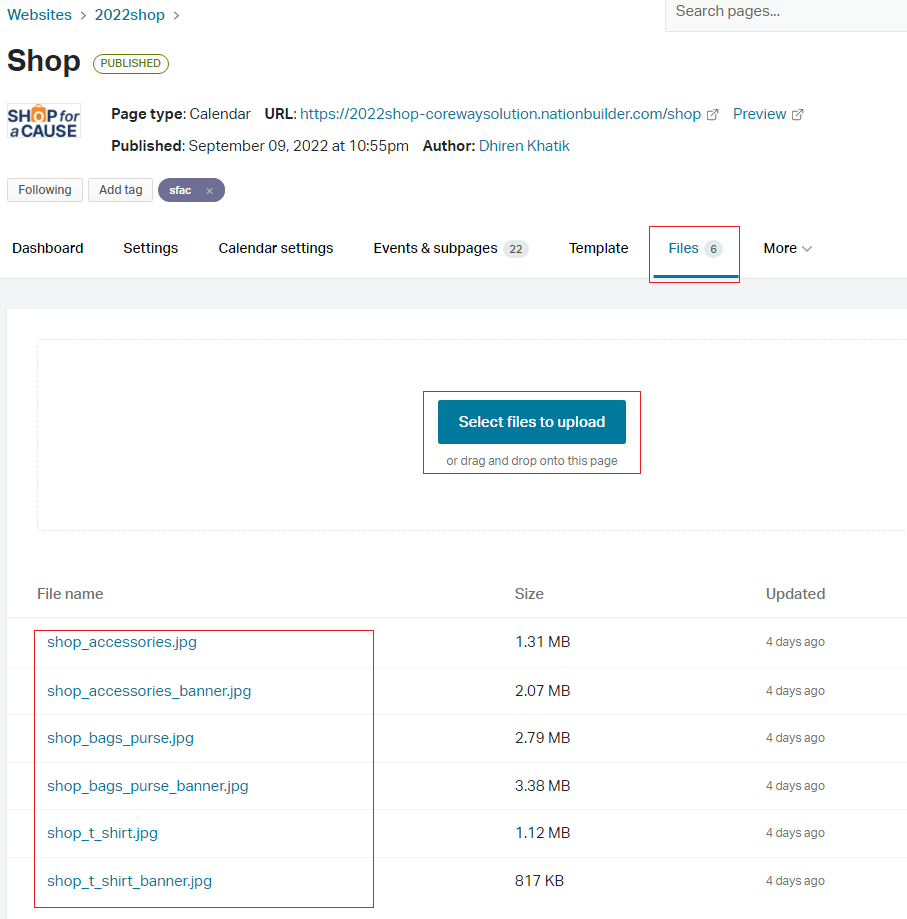
i.e: For the Bags & Purse category the slug should be shop_bags_purse. So the image name is “shop_bags_purse”
NOTE: To get the slug of the respected category name, you should go to Pages -> select Tags from the dropdown as per the snap below

You will get a list of all the tags added for all the pages. There you can find the specific tag you have given to the products. There you can see the slug of your tag.

Recommended dimensions for the category thumb is 368px X 245px.
Category Banner image

To add a category banner image, please go to the main Shop landing page and there go to the “Files” tab, and upload the banner image with the name “category_slug_name_banner”. i.e: For the Bags & Purse category the slug should be shop_bags_purse so the final banner image name should be shop_bags_purse_banner.
Recommended dimensions for the banner image are: 1920px X 500px